

Installing an outdoor security camera isn’t that different to installing one indoors. But, there’s no denying that it requires more time and effort if you want to do it properly. Don’t panic—we’re here to help.
Follow these 7 simple steps to get your outdoor security camera up and running smoothly.
Got an indoor camera instead? You’re in the wrong place. Learn how to install your indoor wireless camera.
Table of Contents
Step 1: Download the security camera’s app
If you’re using a conventional wired security device that connects with a DVR, you can skip this step and step 2. But any device that has internet-enabled features likely has an app to pair with.
Before doing anything, download it and create an account. Most can be downloaded via the App Store (iPhones, iPads) or Google Play Store (Android smartphones, tablets).

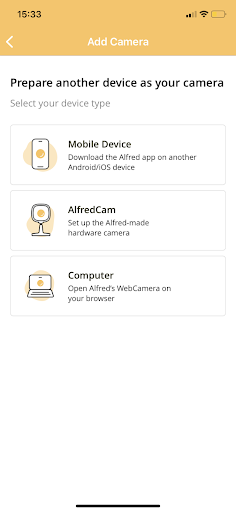
AlfredCamera and Kasa Smart account creation screens. Creating an account with the app is a requirement for most security camera brands.
Take a moment to check through data sharing practices before you agree to them. Find out more about this and other hacking prevention methods.
Step 2: Plug in & sync the camera to the app
Once you’ve completed account setup on the app, it’s time to sync the camera to it. You don’t need to be outside just yet, so you can take off your coat.
Plug the camera in and wait for the status LED to appear. It’s usually red, green, blue or orange. If it doesn’t show up, you may have a faulty product.
We’d suggest troubleshooting first, which you’ll be able to do through the app or otherwise on the website of the manufacturer. If this fails to help, report it through the brand’s customer support.
You’ll notice a prompt to add a new camera in the app’s main menu—it may be a plus sign in the corner or something along the lines of ‘Add Camera’ or ‘Add New Device’.
For many products, a QR code will be shown on the viewing device, which you are prompted to hold in front of the security camera. The camera scans it, and the devices are paired. Other devices may require you to select the camera from the Wi-Fi settings in your viewing device and connect to it as if it were a wireless hub.


Step 3: Pick a location
This is the step we’d recommend spending the most time on because, unlike indoor cameras, having the camera unmounted isn’t really an option for outdoor security.
Your options are more limited, and should follow more specific suggestions to get the most out of your security product.
Height is the most crucial factor in placement if you want to avoid giving trespassers easy access to the camera. It should be at least 9 feet high regardless of whether it’s being used to view the backyard, doorway, or driveway.
This means you’ll need a ladder for location scouting and mounting.
A shady area is preferable to avoid glare, though outdoor security cameras should be able to cope with stronger light than indoor ones. Many also come with sun/rain shields for additional weatherproofing and image maintenance.
Want some more tips on ideal camera placement? Right this way.
If the camera does have wireless capabilities, you’ll also need to consider proximity to the Wi-Fi router.
There’s a much higher chance you’ll need to invest in a Wi-Fi range extender for outdoor security cameras than for indoor ones. You should try to place it as close to the camera as possible on the other side of the wall.
Even if you aren’t hardwiring the device, you’ll need to be prepared to drill through walls in order to feed the cable through and keep it concealed.
Length of the cable is therefore important, so make sure it is adequate enough to reach through the wall and to the power source on the other side.
You can do so by measuring the distance from the interior wall to the power supply. Then add on the height off the floor and allow a several centimeters extra to account for wall thickness.
If you’re unsure, you’re better off going too big than too small, so choose a camera with a cable upwards of 12 feet.
If the cable that comes with the camera you purchased is too short, you can always purchase a standalone cable online.
Step 4: Prepare the tools
You’ll need a couple of tools to mount the camera properly.
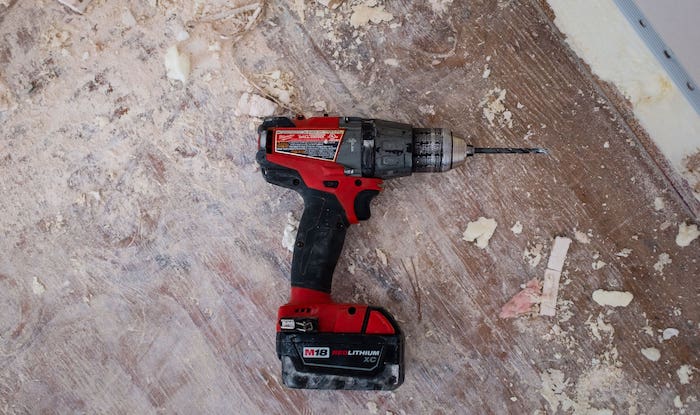
1. Power drill – must be high-powered enough to push through masonry.
2. Masonry drill bits – these are designed to drill through tougher materials like stone and concrete.

3. Electric screwdriver – screwing into exterior walls with a regular screwdriver will be a pain, so we’d strongly recommend an electric one. Most power drills can be used for this by swapping out the bit.

4. Chalk – used to mark the points where the screws will go. If you’d rather use a pencil, be our guest, but it probably won’t show up on exterior walls.

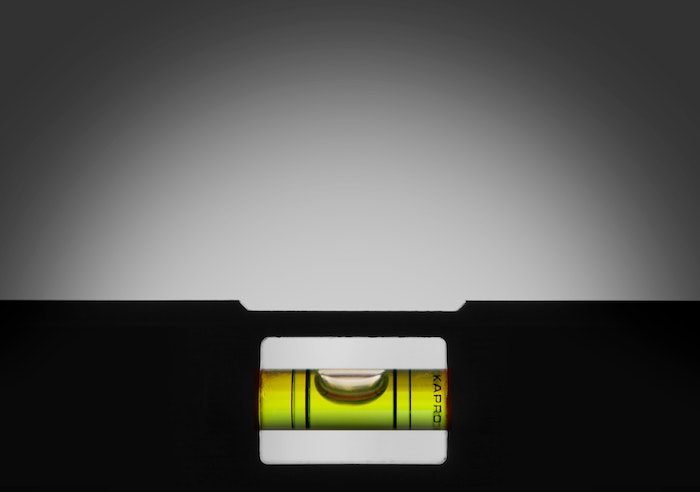
5. Spirit level – can be downloaded to your phone for free, but a real spirit level also makes for a good ruler that you can use when marking the point.
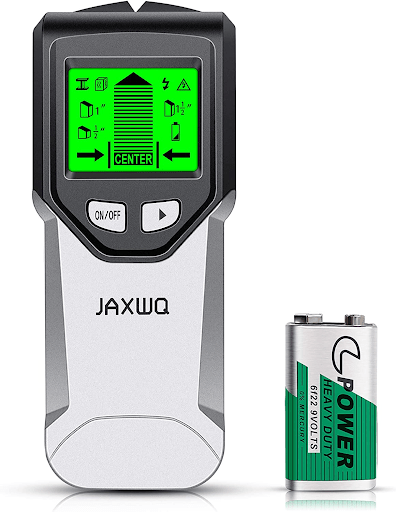
6. Wall scanners – drilling from outside to inside puts the integrity of your walls at risk far more than mounting a camera on an interior wall does. Stud finders, pipe and cable detectors should always be used to assess the area first to avoid significant structural damage.
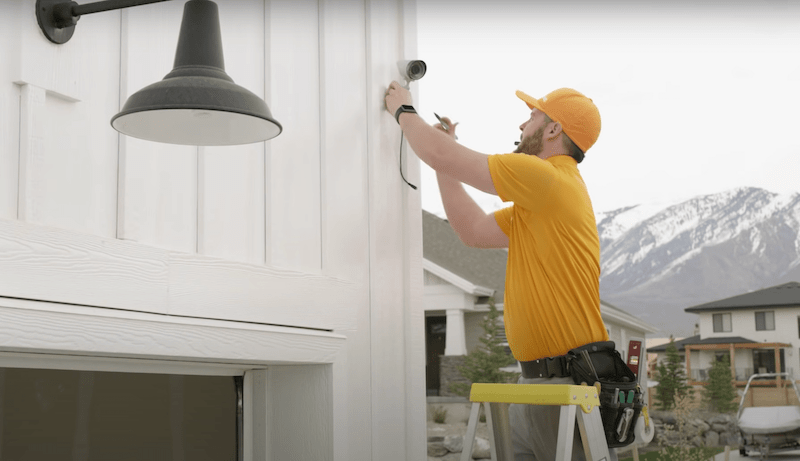
Step 5: Mark where you want to put your camera
Once you’ve picked a location and are happy that the cable can be hidden properly through the wall while reaching its power source, check out the livestream on the camera’s app while holding the camera in place.
Since you’ll likely be on a ladder, it would be safer to have someone else do this, who can then advise on placement. Adjust as necessary for the best vantage point.
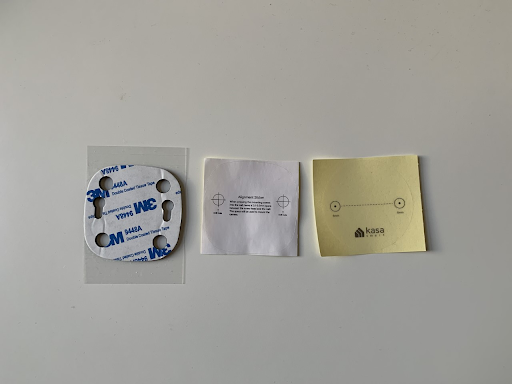
When satisfied, use a mounting guide sticker (included with most cameras) to place the camera accurately.
If there isn’t one, simply measure the distance between the screw points on the underside of the camera, and mark them with chalk, with another mark used to account for the wiring hole. Use the spirit level to make sure it is straight.
Before you get trigger happy with the drill, make sure to use a wall scanner to check for wiring, pipes, or studs.
We recommend doing this for interior mounting as well, but since you’ll be drilling through much more material here for the cable, we’d strongly advise not skipping this.
Step 6: Mount the camera
Go ahead and drill the deepest hole first for the cable. It’s important that you use masonry drill bits. Incorrect drill bits can damage the power drill as well as cause accidents should the bit pop out at speed.
Feed the cable through the wall to its power source before you do any further drilling (it’ll be easier if two people do this, one on either side).
Swap out the bit for a smaller one and drill where the wall plugs will be inserted. Place them inside the gaps and use an electric screwdriver or a screw bit on your power drill to secure the screws in place.
Step 7: Determine if you need a sun and rain shield
After some use, you’ll gradually figure out what needs adjusting, whether that’s automation on the app, motion detection sensitivity, or the position of the camera’s head itself.
Something else to consider for outdoor cameras is whether your camera requires better sun/rain protection than it provides natively.
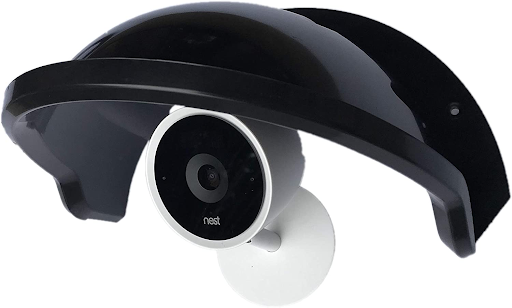
If the image is routinely obstructed by glare or rain droplets, consider buying a sun/rain shield to be mounted above the camera. These can help improve the image by further protecting the device from moisture and glare.
More Tips to Consider
Placement
1. Avoid direct sunlight, which can cause glare.
2. Avoid general traffic from the road, which will trigger motion detection unnecessarily.
3. Avoid waving branches, which will trigger motion detection unless people detection is an option.
Hiding your wires
1. Use a round junction box to conceal the wires
2. Route the extension cable along the edges of the wall or carpet.
3. Use wire cable clips to maintain wire management.
Things to note
1. If it’s battery-powered, remember to put the battery in before mounting the camera!
2. Ensure you have a long enough cable to reach the power outlet on the other side of the wall.
3. Cameras with smaller field of view (45-75 degrees) can be placed in the porch, facing an entryway, or in the driveway looking towards the car, while cameras with a wider field of view (180 degrees or above) should always be at least 9 feet off the ground to take advantage of the wider angle.
Having trouble with creepy crawlies? Bugs are every outdoor security camera’s worst enemy. Learn how to get rid of them.
FAQ
How to power outdoor security cameras?
It may come as a surprise, but outdoor security cameras often use the same USB C cables as most indoor security cameras for power, though they are weatherproofed. Otherwise, wires may connect to mains or to a DVR, which can power the camera through either coaxial or ethernet cables. Other cameras use batteries, which may be replaced or rechargeable. Solar panels are a novel way to charge the batteries.
How hard is it to install outdoor security cameras?
It isn’t as hard as you might imagine, though it is more time consuming than indoor cameras, which don’t always need to be mounted. The main difficulty with outdoor security cameras is that the power cable has to find its way to a source of power somehow, which usually means drilling through the exterior wall.
Do all outdoor security cameras have to be plugged in?
No, not all outdoor security cameras have to be plugged in. Many are battery powered and some recharge those batteries via solar energy, meaning the camera never has to be dismounted. Check out our picks for solar-powered security cameras and learn how they can save you time, effort, and money spent on outdoor surveillance.
Conclusion
Outdoor security is important to the safety of all properties, big and small. Installation is a mild inconvenience compared with the benefits of it, and with a little preparation and a methodical approach, it doesn’t have to be the nightmare it’s made out to be.
Recommended reading:
How to Install Cameras Under Eaves: 7 Easy Steps
How to Hide Security Camera Wires: 7 Fool-Proof Ways
How to Install Wireless Security Cameras Indoors in 8 Easy Steps
DIY Vs Professional Security Camera Installation Explained