

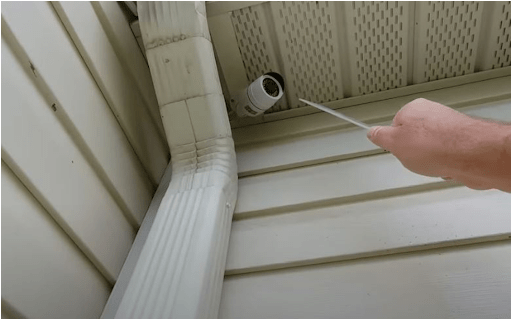
One of the best locations for installing a home security camera is under the eaves (the hanging edges of the roof). They provide a covert vantage point that also acts as a rainshield.
Below, find out how to install cameras under eaves to ensure maximum protection for your family and property following our seven-step process.
Table of Contents
Step 1: Carefully plan the security camera wiring route
Installing a home security camera is straightforward, but wiring the can be challenging depending on the layout of the home. Learn how to run camera wires outside the house and connect to the receiver inside the home.
- Take out your home’s blueprint or draw a layout on paper, including the rooms and other residential components.
- Identify the location of the network device (usually a Wi-Fi router or an NVR/DVR).
- Decide which part of the eaves you want to install the security camera under. Mark this location for reference.
- Draw a line (use a different color) connecting the camera to the receiving unit. This represents the wiring route.
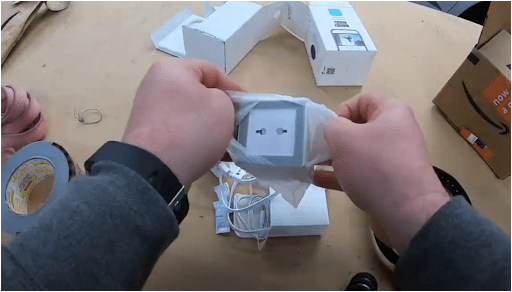
Step 2: Prepare the device and tools
Learning how to install security camera wiring and other components starts with preparing the resources for the project. Have the following items on hand before commencing installation:.
- Outdoor security camera (including wiring and associated components)
- Ethernet cable (for wired network connections)
- Fish tape (around 50-foot-long) for pulling the cable through one hole to the next
- Ladder
- Drill and appropriate bits
- Soffit color-matching paint
- ¼-inch-thick aluminum strip for mounting the security camera bracket on the soffit
- Misc.: electrical tape, file or sandpaper, screwdriver, splicer, tape measure, and flashlight
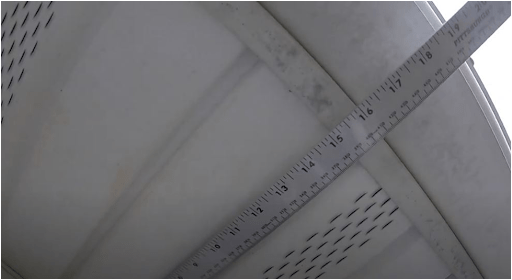
Step 3: Measure the camera wiring route
This step can be a bit tedious, but it’s necessary to measure the wiring route to ensure the correct wire length prior to drilling. Tackle it step-by-step:
- Use the drawing you made in Step 1 to determine how you’ll proceed with the wiring route measurements.
- Secure a ladder against the wall or have someone keep it steady as you assess the eave.
- Measure the eave’s width or depth from the outer edge (below the fascia) to the wall section to approximate aluminum strip length for mounting the camera bracket.
- Go to the attic and use the sketch as a guide in measuring the wiring route.
- Grab the security camera wire and determine its length, ensuring it covers the cabling route.
Step 4: Drill openings in the soffit large enough to fit the camera cable
You have two options for this step, depending on whether you have an attic. If you have an attic,
- Choose a drill bit to create an opening large enough to slip the Ethernet cable through.
- Drill through the soffit from the attic.
- Use sandpaper to smoothen the hole’s edges to prevent the rough surface from scuffing the cable sheath.
Alternatively, if you don’t have an attic,
- Secure a ladder on the wall nearest the soffit section for installing the security camera. Alternatively, ask someone to keep it steady.
- Climb up the ladder and look for soffit joints.
- Use a siding removal tool to dislodge the soffit panel from the rest.
This method will help you run the security camera wire above the soffit without going to the attic. If this doesn’t help, you might want to consider mounting security cameras to fascia instead.
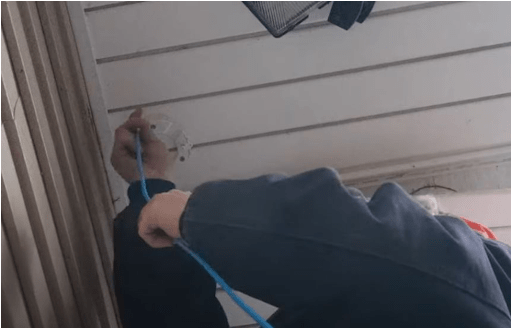
Step 5: Slip the home security camera wires through the holes
You’re a step closer to installing a security camera in the eaves. Next, you’ll need to push the wires through the holes.
- Slip the fish tape’s tip through the hole and advance it as far as you can, approximating the distance to the video recorder or network connection. The fish tape pulls the cable through conduits.
- Grab the fish tape’s tip and secure the Ethernet cable end to it using electrical tape.
- Go outdoors and gently pull the fish tape with the Ethernet cable.
This procedure is easier if you remove a soffit panel instead of slipping the Ethernet cable through a tiny hole. You might also want to learn how to run security camera wires through walls to avoid the blind cable insertion through soffit holes.
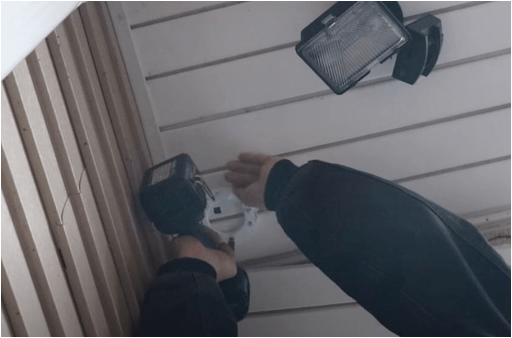
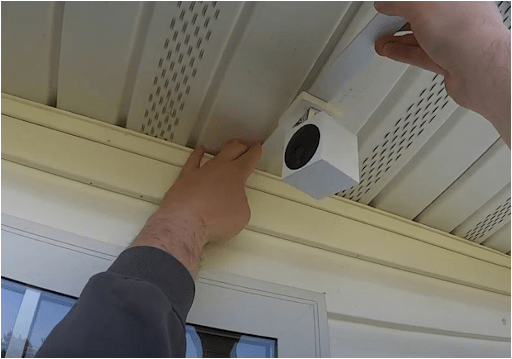
Step 6: Secure the home security camera and establish a connection
This second-to-the last step involves mounting the home security camera under the eave and connecting it to the receiving unit.
- Get the aluminum strip and drill holes for mounting the security camera bracket.
- If color matching, paint the metal strip with a color identical to the soffit and wait for it to dry before proceeding.
- Secure the bracket to the metal strip using screws.
- Use a splicer to prepare the Ethernet cable wires for the Ethernet jacks.
- Connect the Ethernet cable and power cord to the home security camera.
- Secure the aluminum strip to the eave.
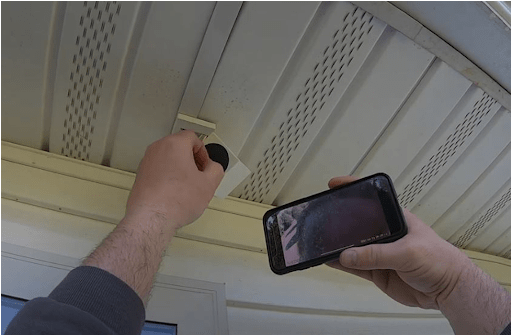
Step 7: Set up and test the home security camera
With everything in place, now it’s time to set up the security camera itself. Here’s how.
- Plug the Ethernet cable into the system’s receiving unit (i.e. internet router or NVR).
- Turn on the home security camera and initiate setup, referring to the manufacturer’s guide.
- Use the camera’s smartphone app to assess the viewing angles. Other viewing devices also work. Adjust the camera’s direction as necessary to optimize the view.
FAQ
Where is the best place to install outdoor security cameras?
Potential entry points for lawbreakers (i.e., burglars, thieves, and home intruders) are the best places to install outdoor security cameras. Examples are near or above off-street windows, doors, and other openings.
Can you attach a security camera to soffit?
Yes, you can attach a security camera to the soffit. However, we recommend checking installation instructions and determining soffit mounting suitability. You can use an under soffit camera mount for the installation.
How do you hide exterior security camera wires?
You can hide outdoor security camera wires by painting the cables the same color as the wall or surrounding surface. Installing a security camera with matching wire colors relative to the wall paint also works.
Some homeowners learn how to hide security camera wires inside flexible plastic tubing, cable guard, or raceway. Others conceal the cables inside baseboards, while some camouflage the wires with decorative elements and furniture.
You can also try slipping the wires above ceilings or placing them underneath the porch.
Learning how to install wireless security cameras outdoor also helps.
How do I hide my front yard security camera?
There are many options for hiding a front yard security camera. The eaves of the roof are a great way to gain height for surveillance while keeping the camera hidden.
Trees, mailboxes, rocks (including faux types), ornamental plants, birdhouses, bushes, and other landscape elements can also conceal a front yard security camera.
Alternatively, you can install the device inside the house facing the street or yard through a front window.
Can I put a security camera on the front of my house?
Yes, you can put a security camera on the front of your home. These devices are legal, provided you install them within your property’s premises and they comply with local, state, and federal regulations.
Should you hide outdoor security cameras?
While hiding an outdoor security camera isn’t necessary, hiding your outdoor security camera can be useful for three reasons.
First, it allows you to monitor your property and its surroundings in their natural state. People will conduct their business because they don’t “see” any camera recording their every move.
Second, hidden cameras give you an idea of an individual’s motive. Are the people within the camera’s viewing angle acting suspiciously?
Third, hiding an outdoor security camera protects it from tampering. Burglars, thieves, home intruders, and other lawbreakers cannot “cut” or interrupt the video surveillance transmission if they believe no security camera exists. That’s why height is important when installing an outdoor camera. Putting the camera in the eaves can be a great way to get a strong vantage point that’s still discreet.
What is the best height for outdoor security cameras?
Eight to ten feet is the ideal height for outdoor security cameras.
Conclusion
You now know how to install cameras under eaves. The process might seem intimidating, but the steps are straightforward.
Of course, you can always hire a professional to set up a home security camera under the eaves. Although it comes with a fee, expert technicians know how best to install a security camera considering the home’s layout and physical features.
Recommended reading:
How to Install Outdoor Security Cameras in 7 Simple Steps (with Pictures)
How to Hide Security Camera Wires: 7 Fool-Proof Ways
DIY Vs Professional Security Camera Installation Explained