

We’re taking a hands-on look at some of the best security cameras on the market to help readers make more informed choices about their security products.
A solid indoor camera with 355-degree motorized panning, the Reolink E1 Pro has its share of unique, much-wanted features, as well as some that are overlooked.
Main Features
- 4MP/2K Super HD
- 355-degree horizontal panning
- 50-degree vertical tilting
- 2.99 x 2.76 x 4.21 inches
- 200g
- Two-way audio
- Motion detection
- Continuous recording via microSD (up to 128GB)
- Works with Google Voice Assistant
| Pros | Cons |
| ???? Very high image quality ???? Push notifications are super fast ???? No login required during setup ???? Flexible detection zones greatly improve utility of motion detection ???? microSD support for continuous recording | ???? No motion tracking greatly reduces the utility of the motorized panning ???? Latency issues on the live feed |
Unboxing AlfredCam: Brilliant Security On A Budget
Table of Contents
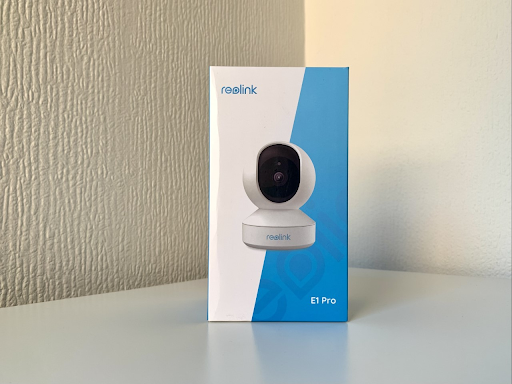
Packaging
Reolink’s E1 Pro is housed in hard white plastic, which is unlikely to be recyclable in many places.
At 2.99 x 2.76 x 4.21 inches, the camera is larger than most budget home security cameras, and it is very well protected.
Inside you’ll find the camera, charger and cable, screws, wall plugs, mounting plate, mounting guide, quick start guide, and a ‘video surveillance’ sticker.
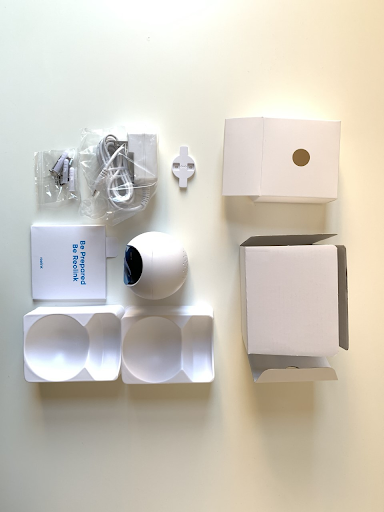
The quick start guide is a little more in the depth than the most, with a useful mounting guide and some installation tips. It’s only printed in English for the US release.
Installation & Onboarding
| App Setup Time | Mounting tools included? | Drilling? |
| 1-5 minutes | ✅ | ❎ |
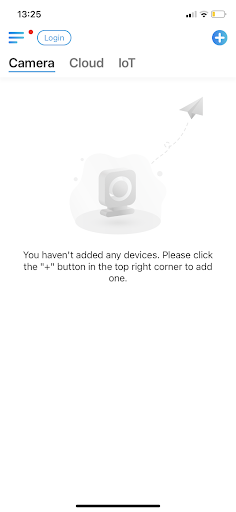
Setting up the camera was quick and painless, in part because the Reolink app doesn’t require an account to be made.
Otherwise, pairing the camera follows the usual process. Plug the device in and it will power on (indicated by a blue status LED).
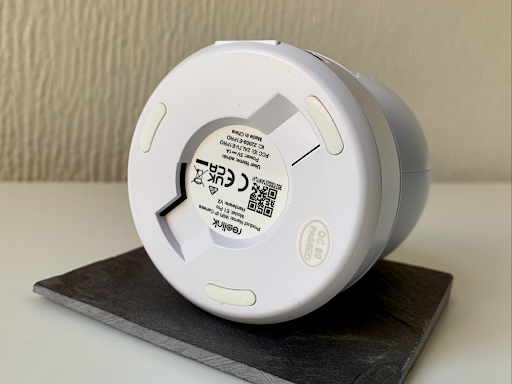
On the app, users are prompted to scan a QR code found on the bottom of the camera. Soon after, the camera itself starts welcoming you in English, German, French, Portuguese, and Spanish.
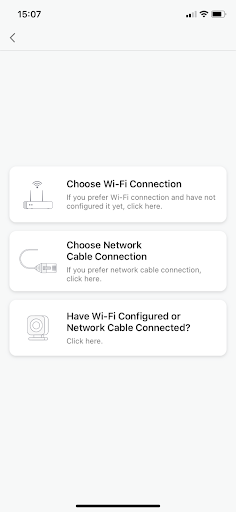
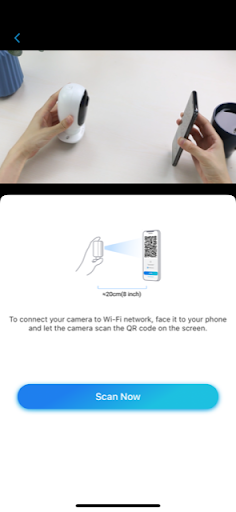
Following the onscreen instructions is simple enough, and users can choose to connect the camera to LAN or Wi-Fi, which has to be entered manually.
A QR code eventually appears on the phone, which is held up to the camera for it to be scanned. It beeps, and setup is complete.
Although an account with Reolink isn’t necessary to use the device, users do have to create a password for the individual camera device.
By successfully pairing the device, a default device account is automatically created with the name ‘admin’ and, presumably, a default password used up until the point at which the user changes it.
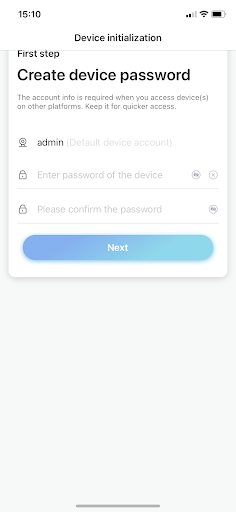
We recommend changing the name and creating the password linked to the device without delay, because this could leave the user more vulnerable to hacking and data breaches.
Users can name the device before a final QR code pops up for other people to scan if they want to connect to the camera. This can be viewed at any time, and is a useful way to share access without compromising passwords.
Mounting the camera is simple, and the quick start guide provides a detailed explanation on how to do it.
Like other devices, there’s a mounting guide sticker that will ensure only the right spots are drilled into. Screws and wall plugs are included, and these attach to the mounting plate that slides into the bottom of the device.
It’s a 360-panning, spherical-shaped camera, so it’s much more suited to upside down mounting on a ceiling than it is to the side of a wall. This will allow users to get the most out of the motorized panning and the relatively wide angle lens.
No time for installation? AlfredCam is ready to use in minutes.
Hardware – Durability, Aesthetics, Size, Weight
| Size | Weight | Weatherproof? | Casing | Tilt/Pan? | Local Storage? |
| 2.99 x 2.76 x 4.21 inches | 200g | ❎ | White matte plastic outer shell | ✅ 355 degrees horizontal,50 degrees vertical | ✅ microSD up to 128GB |
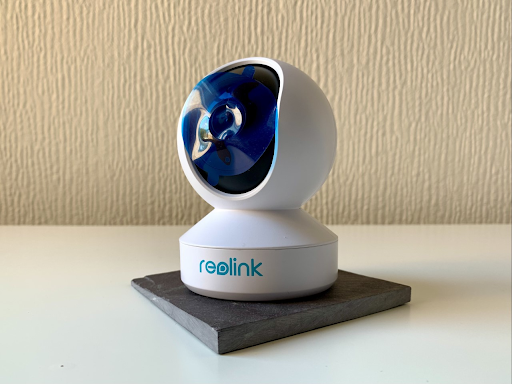
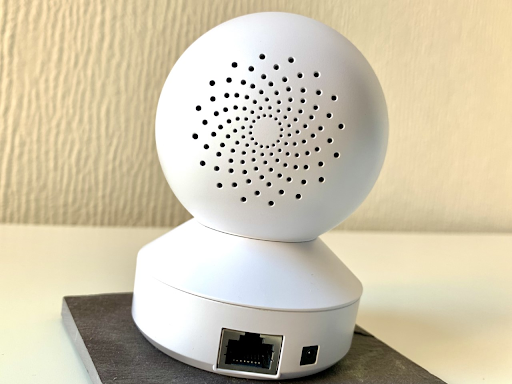
Reolink’s E1 Pro is 2.99 x 2.76 x 4.21 inches and weighs about 200g. It’s made of a durable, matte white plastic. The camera is attached to a base with motorized 360-degree panning. The lens can also tilt vertically 50-degrees.
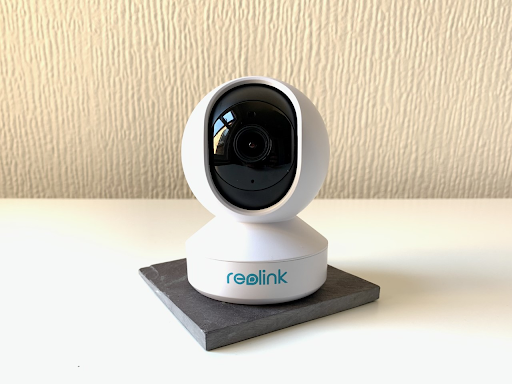
Much like the Kasa Spot Pan Tilt, the lens area is black, which makes the device pretty obvious looking.
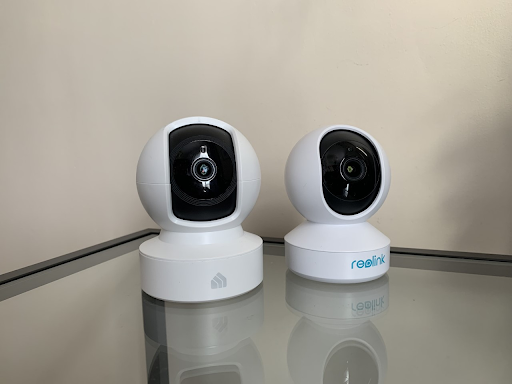
In fact, aside from being a little smaller, the design is similar to the Kasa device, down to the MicroSD card slot being hidden beneath the outer casing. The reset button sits beside it, and revealing both requires tilting the camera lens upwards via the app.
Unlike Kasa Spot Pan Tilt, the panning ability of the camera is fluid, free of jerkiness and noise.
This means it’s less likely to disturb sleeping babies or their equally exhausted parents when it spins around. Still, owing to its size and look, it isn’t suitable for more covert surveillance.
The device isn’t powered by a USB cable, so has to charge with a conventional plug.
Small, ergonomic, and durable, AlfredCam is both lightweight and tough. Find out more.
Software – App Usability, Features, Third Party Compatibility
| Wi-Fi? | LTE Data (3G, 4G, 5G)? | Bluetooth? | Wired? |
| ✅ | ❎ | ❎ | ✅ |
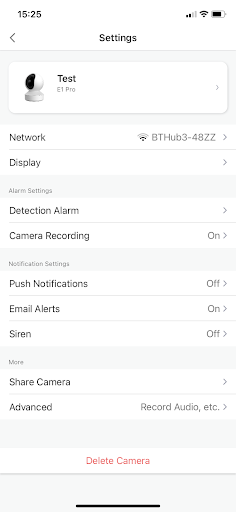
The Reolink app is needed to use the E1 Pro. Despite the harsh reviews on the App Store and Google Play Store, the app functions well and is designed with simplicity in mind.
I found the streamlined settings menus very user-friendly compared with other security camera apps.
Rarely was I required to go through more than one menu to access a particular setting, making it easy to pick up and start making adjustments right away.
The app supports Google Voice Assistant integration.
There are far fewer features than the Kasa app, which is built for smart home integration, but users looking for fuss free surveillance will appreciate the ease of it.
The interface encourages live feed viewing more than it encourages camera use based solely on push notifications. The initial setup has no prompts to activate motion detection or push notifications.
It feels ‘old school’ in that regard, and it can be used in an ‘old school’ way so long as the user inserts a microSD card (not included).
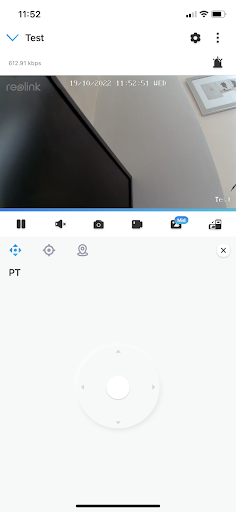
The ‘clip’ feature is a digital zoom tool that allows users to single out small spaces in the frame in real time.
Two separate live feeds are displayed: one has the full frame, where you can drag a zooming box around, and the other, displayed above, shows the zoomed in area.
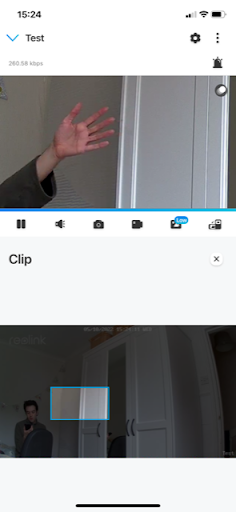
It’s excellent for getting a clearer look at moving faces and objects. There is significant delay between the ‘clipped’ screen and the full frame screen beneath it that’s indicative of the broader latency issue (more on that later), but it doesn’t hinder usability drastically.
Motion detection/sensitivity features are also useful. Rather than having a plain rectangular detection zone, a ‘paint’ tool allows for substantially more flexibility in deciding the detection zone than on other camera apps.
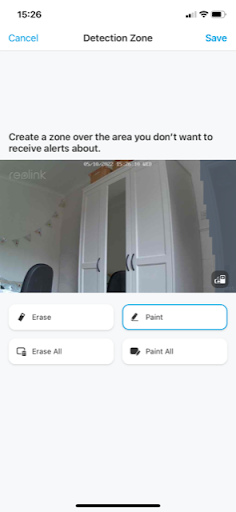
Users can ‘paint’ the areas they want to be excluded from the detection zone, meaning backgrounds can be easily blocked out even if they are unusual or narrow shapes. This can help reduce the number of push notifications.
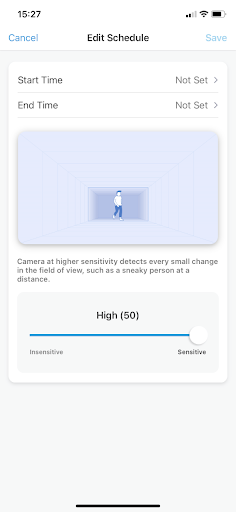
Sensitivity is expressed out of 50 points, with 50 being the highest and 1 being the lowest. Sensitivity can be scheduled, which is a surprisingly handy way to more effectively monitor areas that experience high traffic at certain times and low traffic at others.
Similar to the motion detection ‘paint’ tool, the ‘privacy mask’ is a clever tool that can be used to black out specific parts of the frame.
Much like the detection zones, this provides a greater degree of freedom in determining the size of the area that is excluded from the footage than in other security camera apps.
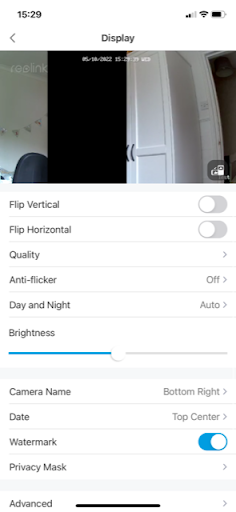
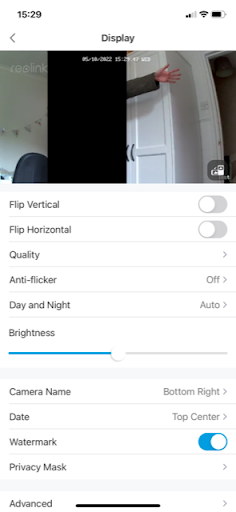
Privacy masks can be used to black out a specific part of the frame.
This feature, alongside the motion detection tools, point to the camera being mounted in one specific location. They’re great features, but the usefulness of these features inadvertently discourages using the panning because they work only if the camera is kept static.
AlfredCamera remains the most popular security camera app for iOS and Android devices. Discover how AlfredCam is integrated easily into the app.
Camera
| Quality | Frame rate | Field of view | Infrared |
| 2K | Up to 25 FPS | 355° panning | ✅ |
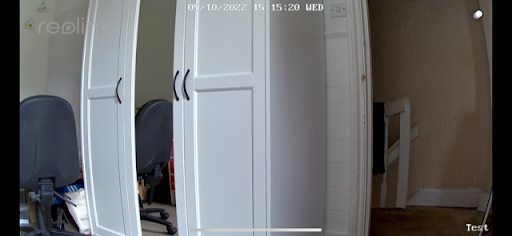
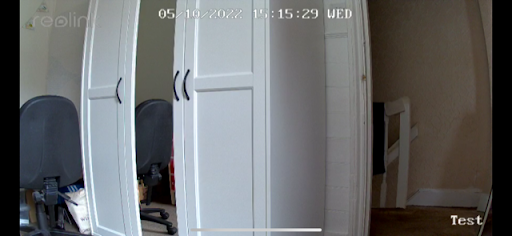
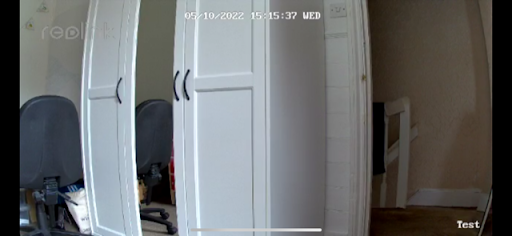
The camera’s most impressive feature is the image quality.
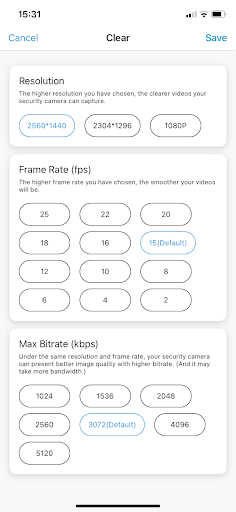
Quality settings are split into three—a high, medium, and low setting—but these are just presets.
It’s possible to combine dozens of different settings, which includes different resolutions, different frame rates, and different bitrates, to find the perfect sweet spot for your needs as determined by your internet connection.
| Resolution | Frame Rate | Bit Rate |
| Resolution is the number of pixels displayed in the frame, vertically and horizontally. The higher the number, the more clear the image looks. Resolution is commonly represented by terms like ‘720p’, ‘1080p’ and ‘4K’. 4K is an exceptionally high resolution, while 720p is considered the lowest ‘high definition’ standard. | Frame rate is the number of individual frames displayed per second. Think of any moving image as multiple images displayed in quick succession, like drawing in a flip note. A frame rate of 15 means that 15 individual frames are displayed per second. The higher the frame rate, the smoother the video looks. | Bit rate has little to do with the camera’s capabilities. Instead, it refers to how much bandwidth is consumed by it, represented in kbps (kilobits per second). A high bit rate means better quality and faster responses. However, if the camera consumes high amounts of bandwidth, it will significantly slow your internet down on other connected devices. |
The E1 Pro had significant latency issues, with delays on the live feed sometimes clocking in at 4 seconds on the highest preset quality setting.
When the stream freezes, a message is displayed suggesting the quality should be switched from 4MP (the highest 2K setting) to ‘balanced’ (the middle setting) to mitigate the issue.
The night vision works well, making great use of the camera’s excellent image quality to produce clear images in the dark through infrared.
As with the Kasa Spot Pan Tilt, fast moving objects that appear too close to the lens cause the camera to struggle with white balance, but I found it rectified this much faster.
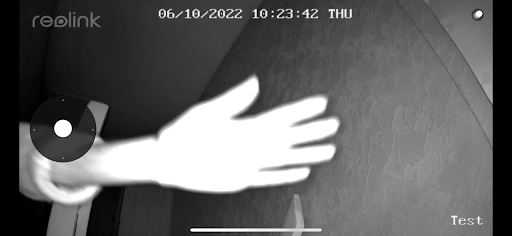
Infrared lights can be turned off or set to turn on automatically when the image becomes too dark.
Despite the obvious latency issues, the motion detection push notifications were remarkably fast.

For whatever reason, Reolink decided to omit motion tracking, which gives competitor models like the Kasa Spot Pan Tilt a firm advantage over the E1 Pro.
Motion tracking refers to the ability for the camera to move by itself when a person comes into the frame, following the object through AI as it moves across the space.
Simply put, the panning ability is not very useful without it. It’s a shame, because the panning is smooth and quiet.
With the absence of motion tracking, the inclusion of a wide lens, and all the nifty features designed for static surveillance, there’s really not a lot of reason to pan.
If motion tracking is a make-or-break factor, it might be worth checking out the E1 Pro’s big sister, the E1 Outdoor, which does allow for motion tracking.
Up to 1080p HD live viewing provides smooth, reliable indoor surveillance. Learn more about AlfredCam’s technical specs.
Audio
| Microphone | Speaker | Siren |
| ✅ | ✅ | ✅ |
Two-way audio allows for app users to communicate with those on the other side of the camera. It worked well.
Users tap on a microphone icon, which allows them to speak through the phone’s mic and have their voice projected by the speaker on the back of the camera.
Audio recording can be enabled or disabled, which may reduce file size should the user intend to use a microSD card for continuous recording.
A siren sample can also be activated from the app, and is loud enough to scare off would-be intruders and whoever else should turn up uninvited.
Unlike the Kasa Spot Pan Tilt, there’s no audio-based detection settings here, which come in handy for baby monitoring.
Alfred’s excellent two-way audio means it doesn’t miss a beat, visual or auditory. Discover the different ways you can use AlfredCam’s two-way audio function.
Cost
| Reolink E1 Pro | Subscription Service |
| RRP $59.99 | $6.99 / Month |
The E1 Pro usually retails for just over $50, which puts it in line with other budget IP cameras.
Although it isn’t required, users can subscribe to Reolink Cloud to get additional cloud storage. Plans start at $6.99 a month.
Keeping costs low on security products doesn’t mean sacrificing quality. Enter AlfredCam, available now for just $29.99.
Recommended reading:
Wyze Cam V3
Kasa Spot Pan Tilt (EC70)
Reolink E1 Pro 2K
Wyze Cam Pan V2
Google Nest Cam (Battery)
Ring Stick Up Cam (Battery)
Blink Mini